Pattern pic
So how did I find the pattern? Its ok, but the instructions around sewing
the neckline aren’t great. My top tips for this pattern are
- For the neckline, the way the folds should look before you attach it to the back piece/collar is as follows. This isn’t how it looked when I followed the fold lines on the pattern, but with a bit of experimentation I decided this was right
- The collar pattern piece is way too small. Cut it like 3 times bigger than the pattern (easy to trim it down when in place but you can’t make it any bigger if you follow the pattern)

- I found it easier to make the collar front & back as one piece so you can just fold over
- The collar piece attaches to the back with the short end, not the long end (why don’t patterns tell you these details!!)
- When you attach the front to the back/collar, you want to sew in a straight line. Sounds obvious but with how the collar attaches, the temptation is to have an angle in it, but don’t keep sewing straight & trim off the excess
- Ensure the collar piece extends beyond the front when you attach it the front so you ve something to fold over
- Once you’ve got this bit cracked, the rest is totally straightforward!!
 Pattern Hack 1: So my
first project was to do the pattern without buttons. I have an aversion to sewing buttons &
button holes. I’ve made a fair few
mistakes sewing button holes in the past and I hate handsewing so attaching
buttons isn’t my favourite task either.
So for this one, instead of cutting 2 of the front pieces, I just cut it
on the fold. This worked well, however
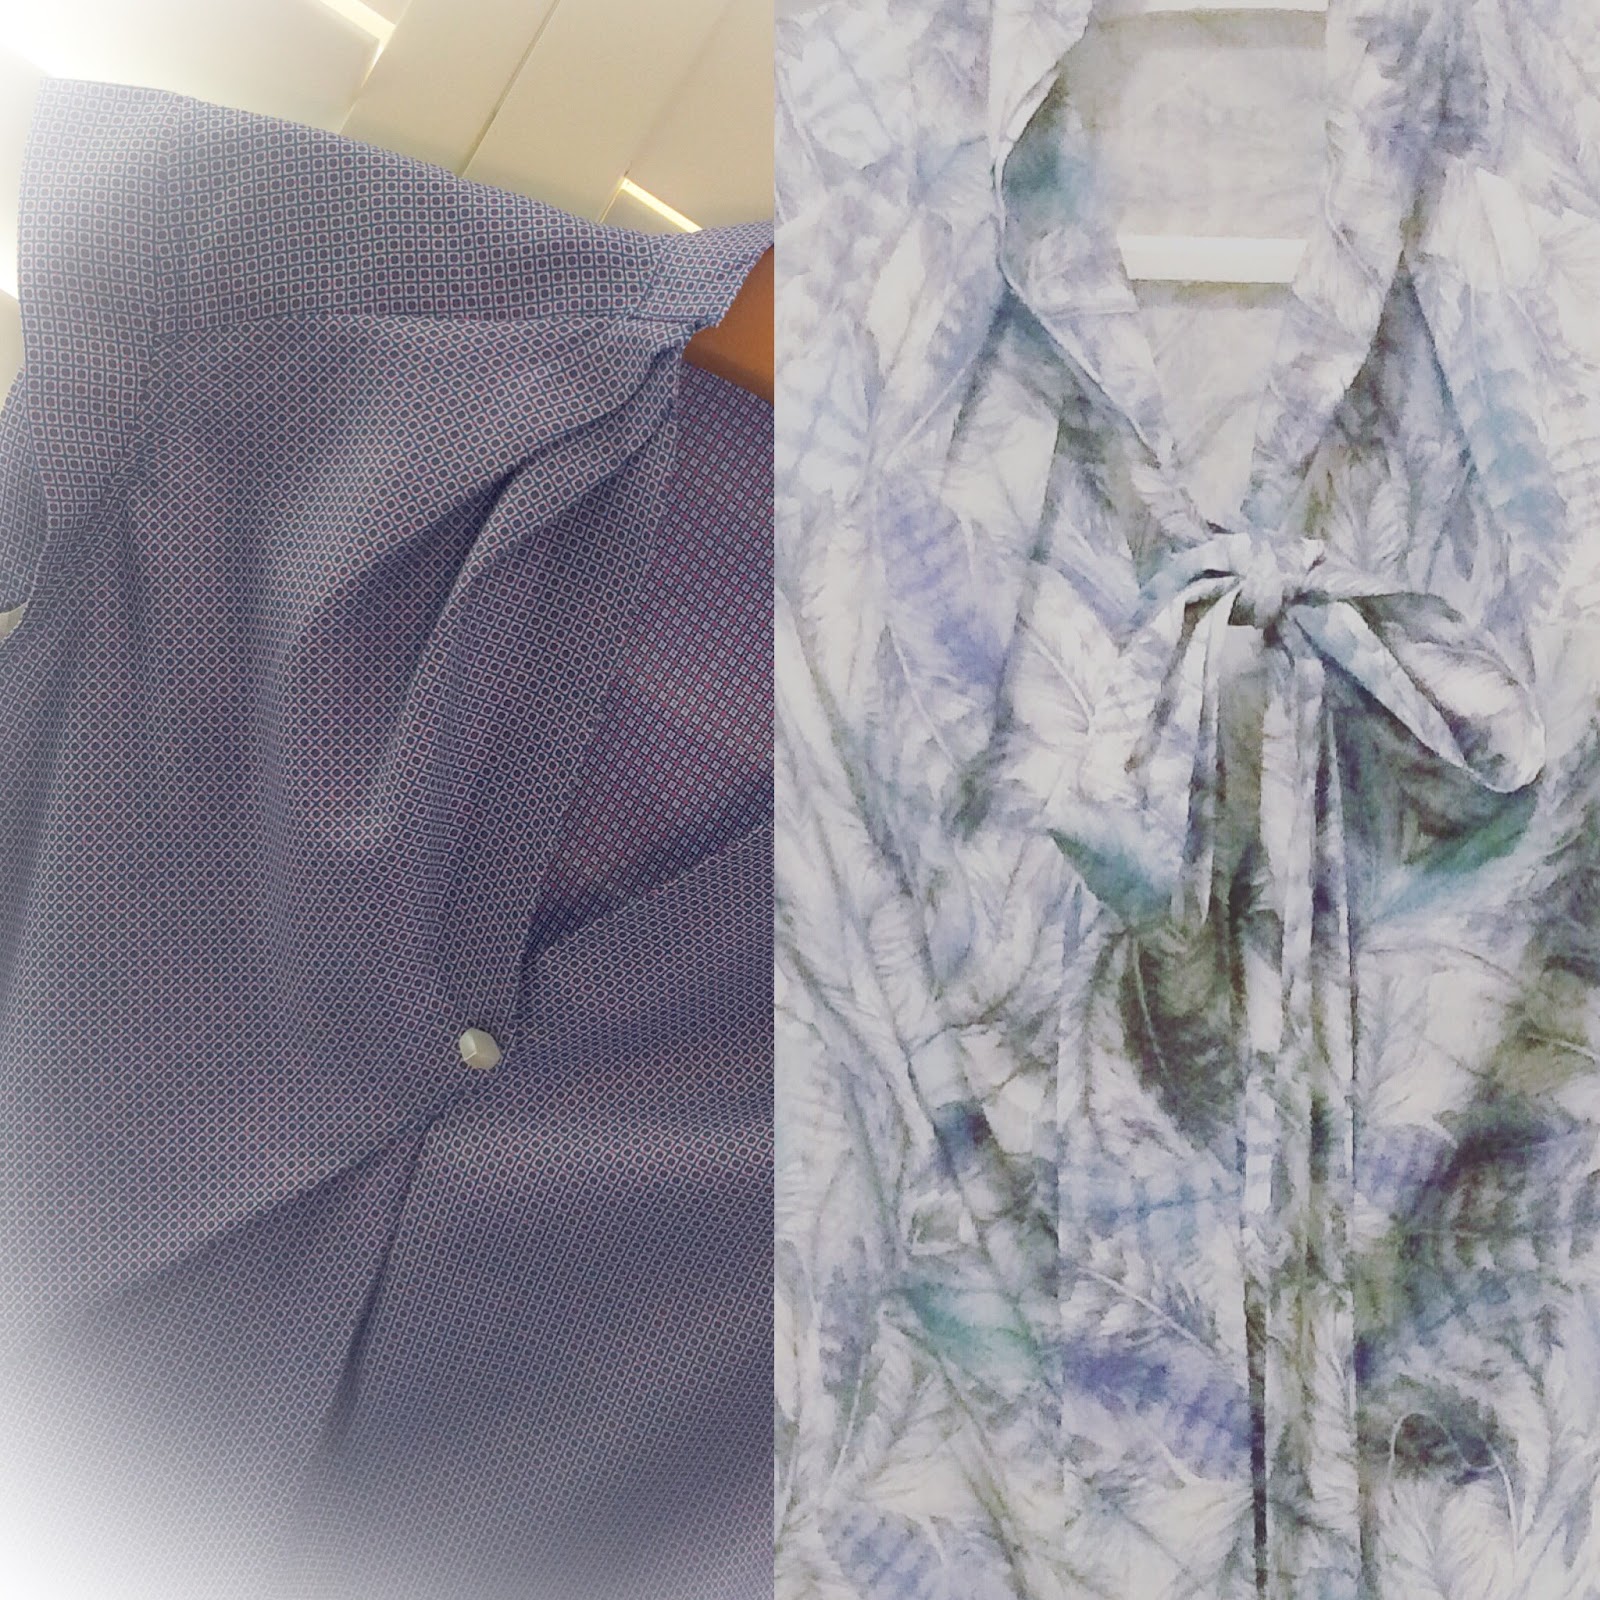
for me the neckline was then a bit low & a bit baggy, never fear- I
therefore folded it over a bit and added a button and was very happy with this
‘structural’ neckline that is quite distinctive! I added a small cap sleeve as I thought that
looked best to balance out the neckline.
Pattern Hack 1: So my
first project was to do the pattern without buttons. I have an aversion to sewing buttons &
button holes. I’ve made a fair few
mistakes sewing button holes in the past and I hate handsewing so attaching
buttons isn’t my favourite task either.
So for this one, instead of cutting 2 of the front pieces, I just cut it
on the fold. This worked well, however
for me the neckline was then a bit low & a bit baggy, never fear- I
therefore folded it over a bit and added a button and was very happy with this
‘structural’ neckline that is quite distinctive! I added a small cap sleeve as I thought that
looked best to balance out the neckline.
Note on this first one I made a mess of the collar. I cut the piece way too small so I ended up
sewing a second collar totally over the first one to fix it. Anyway I think it looks ok and shows you can
salvage it if you go wrong first time! I
would have unpicked it but the fabric is a little delicate for that.
I m loving this one!
Fabric is from Croftmill
Pattern hack 2: I totally love this Liberty feather tana lawn so this was my inspiration for number 2. I only had 1
precious metre so I needed to stretch it as far as possible. This time I did the button up version. Neckline was fine second time round as I started off with a much bigger collar piece.


My hacks this time were:
-
Adding sleeves (I just took a sleeve pattern off
another top that looked like it would fit and made the sleeves as long as I
could with the fabric I had left!!) I
found some binding in the perfect blue colour so used a bit of that as an
accent around the sleeve (and inside collar)
-
Detachable pussybow! This I’m super happy with & can’t believe
I didn’t think of this before!! I love
pussybow blouses but with a 1 yr old they are not the most practical as he
tries to swing off them and they dangle in his face when I try to put him in
& out of his pushchair!! So this was
the ultimate solution & means I have 2 tops in one. I finished the neckline
of the top as per the pattern then made the pussybow with just a very long
strip of fabric. At the moment I ve just left it totally loose – when its worn
on top of the blouse you can’t tell its loose and its easy to take off. But you could add a button at the back to
hold in place if you wished! Here it is
with & without the bow! Can’t
believe I managed the entire blouse out of 1 metre!


- So there we have it – 3 tops really from the same pattern- very happy with them!! What have you pattern hacked recently? MessyEssyMakes xx
No comments:
Post a Comment