BLOGLOVIN'

Follow
Showing posts with label Messyessymakes. Show all posts

Sunday, 10 March 2019

Jasper sweater love

I love a good sweater - since I discovered Liberty sweater fabric I haven't looked back, actually spending a lot of time wearing them - perfect for working at home, being mum, late night feeds, running around the playground - you get the idea. 


So far every one I have made are using the Grainline Linden, and variations thereof.  I like but don't love this pattern.  Its just not as cosy as I would ideally like- the neck is too wide for my liking and I always wish it had pockets.  

So I finally got around to sewing up the Jasper sweater by Paprika patterns.  Now I'm ashamed to say I've had this pattern in my stash for a good few years and I knew I would love it the minute I saw it, but I didn't tackle it as I assumed it would eat fabric and that it would be complicated with welt pockets and all.  I am very pleased to report that I adore this pattern and neither concern proved to be true.  

The reasons I love it... its everything the Linden is not - snuggly & cosy, a little fitted and HAS POCKETS!  Its a straightforward sew and making the pocket is especially satisfying.  It  must use more fabric than the Linden, but because of the piecing, you can combine fabrics using up some scraps so I find it quite economical (I don't like to have to buy more than one metre of Liberty sweatshirt fleece/loopback due to cost and happily managed both of the below with that plus scraps left from other stuff.)

And there are 3 options- a hood, a funnel neck and a dress version.  I ve made the first 2, dress to follow ;)


Here is the first one I made and the sad story of my fabric letting me down... grrrrr. 

Its made with a Liberty Loopback, bought from Guthrie & Ghani with a contrasting Denim look Loopback from my stash.  Then I used a navy flecked jersey for lining pocket & hood.  I absolute love it.  


I really like the fit of the pattern- no adjustments at all, it fitted great.  I find the side panels give a bit of shape and structure and the contrasting fabric choice makes it look quite streamlined and less bulky than most sweaters.

The hood on this jumper is absolutely huge.  Its fine down, looks actually quite nice being chunky, but you just wouldn't wear it up - I could actually fit 2 heads in it.
The only negative I have on this are firstly the size of the hood and secondly, I don't like the way the hood is finished, a lot of seams would be visible, and very visible when it is so huge! Loopback was white on reverse, looking terrible so I lined the hood, but it was difficult to attach- next time I would construct hood differently and significantly reduce size.

Giant hood alert!!

I'm gutted to report that since washing it has incurred some issues.  I can't remember where I got the denim loopback from but its letting me down.  Some patches have gone really strange meaning one side looks totally different to the other- really don't understand it.  And when I ve washed it, its started coming away at the seams in 2 places- I've sewn alot of knit fabrics and I've never experienced this before!!.  Note to self,  never risk mixing Liberty fabric with an unknown quality one.  
 For my next one, I m using a trusted loopback from Fabworks with the Liberty to ensure it will stand the test of time...So onto version 2, this time without the hood.  This version I find more practical to wear actually- the neck sits nicer when not puled back by the giant hood and it fits easier under coats.  I've lived in this one since making it.


I started with the Liberty (also loopback from  G&G) and went through my stash to look for a royal blue to combine with it- but then I came across this duck egg loopback and it just looked perfect.  So that was that!  I then used a scrap of red as a pocket accent and then choose a very thick fleece back jersey for lining the neck- a nice contrast and the body helps the neck sit nicely and makes it extra snuggly.


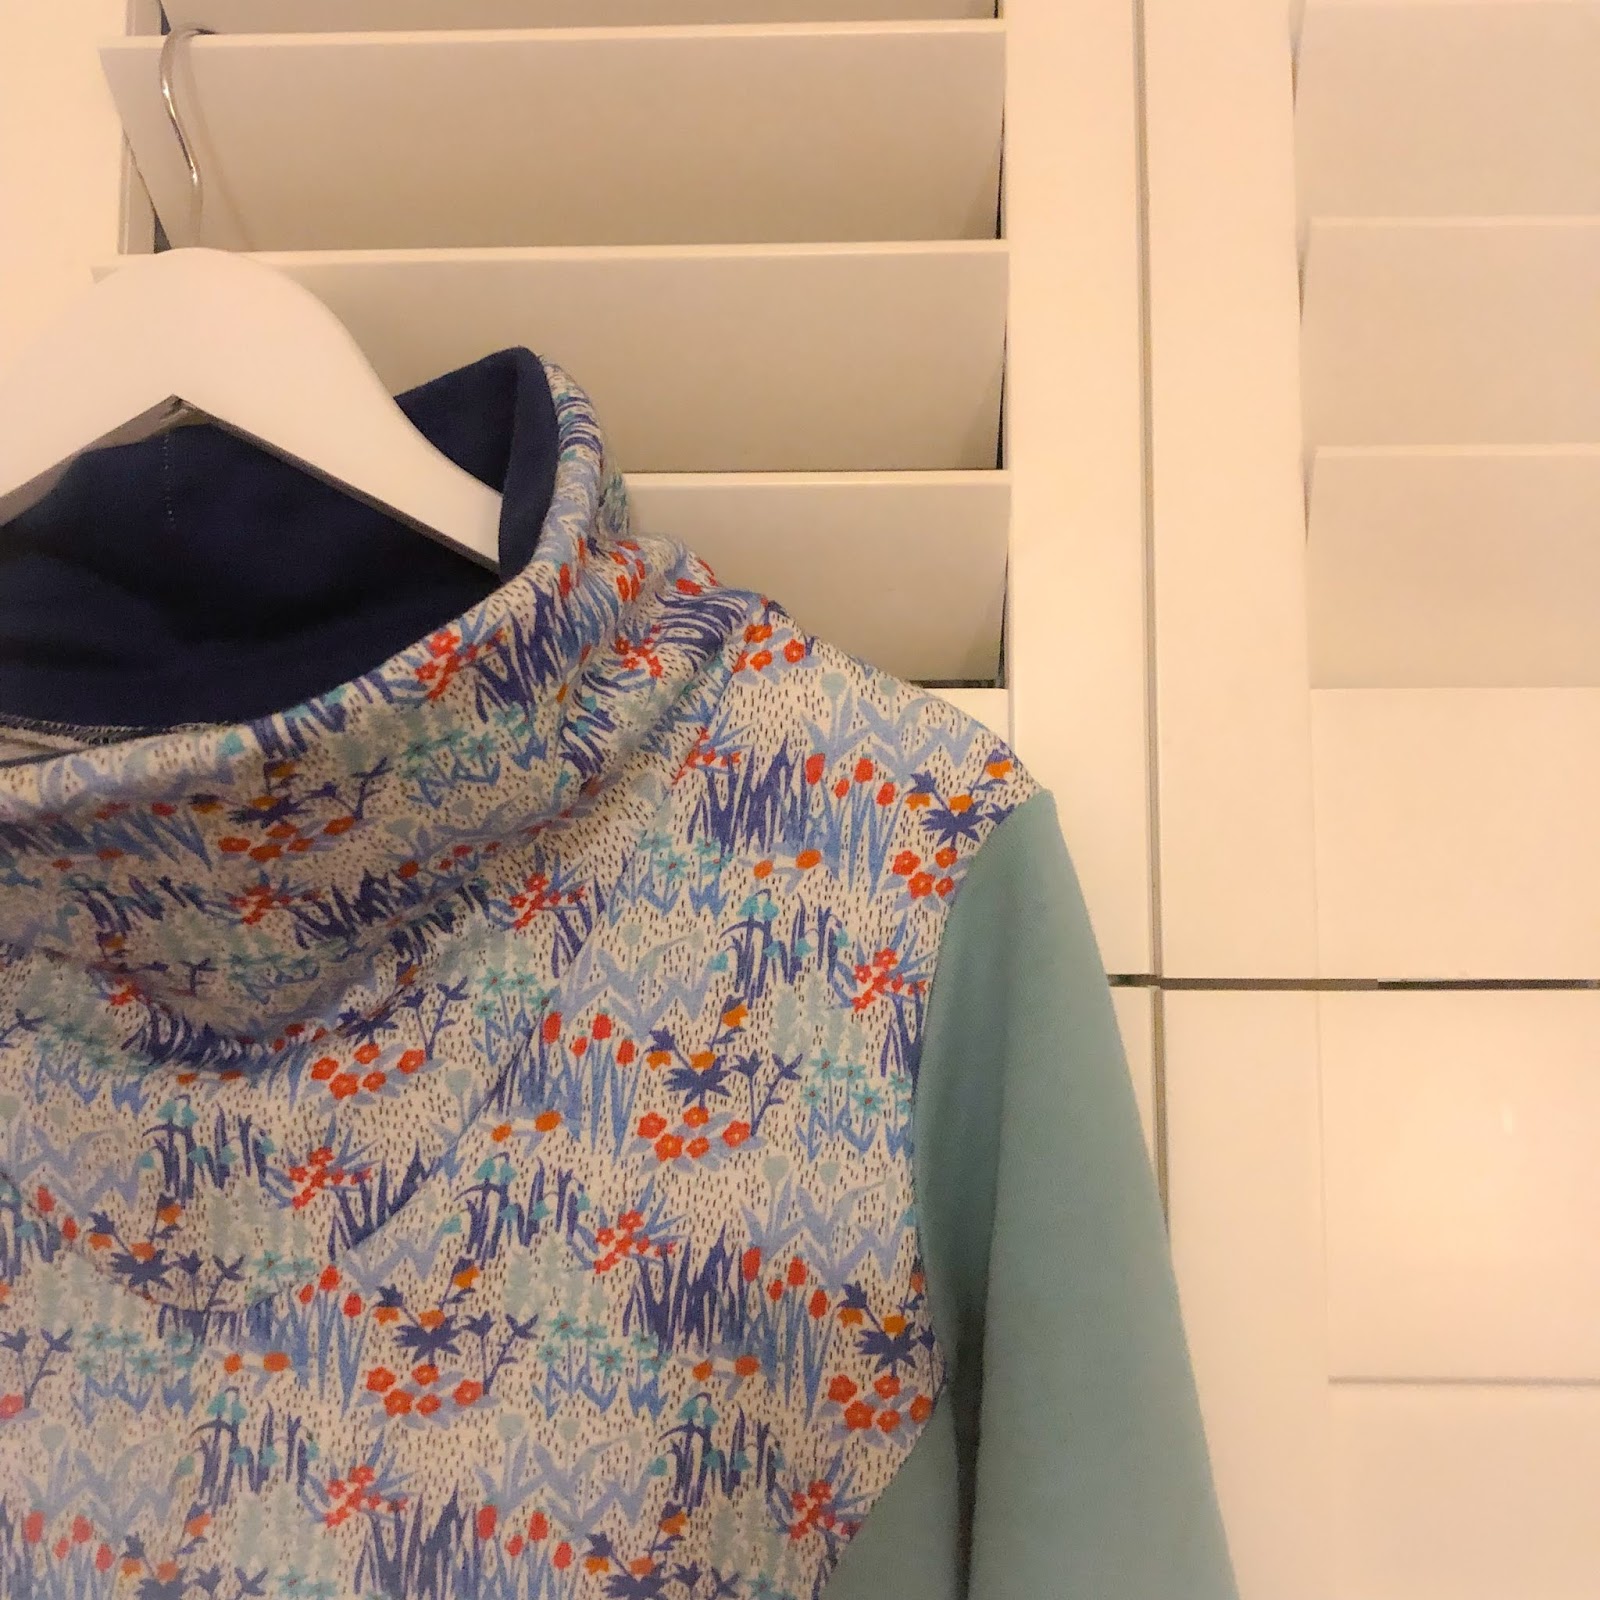


I just love this.  Everyone needs one of these sweaters in their life!!


Sunday, 11 March 2018

Maternity Sewing Plans

Phew its been a long time since I did either sewing or blogging...  the reason being, not only have I been crazy busy with work and travelling a lot, I am also pregnant!  And for the first 3 months I was terribly sick... in those months I did nothing but sleeping, working and being sick.  Anyway as I headed into my 4th month, the sickness thankfully ceased and I got back to feeling like me again.

In these past weeks therefore, I m back sewing, creating my perfect baby wardrobe. I say baby wardrobe as learning from my first pregnancy, I don't really believe in 'maternity wear'.  You can wear your regular clothes for at least the first 4 months, there are then 6weeks when you fit in neither normal nor maternity wear particularly well - then maybe 4 months tops when you need full on maternity clothes.  Thats not long, to be buying or creating a whole set of new clothes.  As with my first baby, I plan to breastfeed and that period actually lasts a whole lot longer than the time you need maternity wear and also has very specific clothing requirements.  And finally- no one tells you beforehand that it will be a bloody long time before your usual clothes fit again!!  And I really didn't enjoy 'maternity wear'  post baby with all that extra fabric around the waist, making you feel even bigger than you already are!  

I set myself one golden rule to creating a wardrobe for my second baby...

 Anything I create must be wearable both in pregnancy, during breastfeeding and ideally after that (maybe with a few alterations).

I m not a fan of the maternity look, I found last time the things I wore most were regular  jersey dresses and tops (mainly from Boden or Joules)  with a high waist under the bust or wrap dresses/tops.   There are a few things I think you can't live without - appropriate underwear, maternity tights, a few vests and maternity jeans.  But for dresses and tops, I think 'regular wear' carefully chosen can suit quite fine, with much more longevity.   Here are a few of the (RTW non maternity) dresses I wore lots last time:

And here are the me-made things I've worn non stop for the first 4 months that well accommodate a small bump- basically stretchy dresses, shirts & shirt dresses, tunic style tops and sweatshirts.


On to the sewing plans! Here is what I have on my list, some of which I've started on already...

TOPS:

From top left, clockwise: Tilly & the buttons Rosa, Grainline Archer, Tessuti Alice Top, Vogue V8816, Sewoverit Lilly, Burda 6838.

First up, for early pregnancy (months 3-5) and for breastfeeding and later... shirts.  I 've just finished one new Archer in a gorgeous Liberty and have plans for one more as well as a Tilly & the Buttons Rosa dress in Liberty Needlecord to make after the birth.  I've worn my current one non-stop in the past weeks, but now its reached its limit.  I know I'll wear it all the time for breastfeeding since its got  easy open popper fastening and is super comfy.  I also know V8816 works well as I wore that constantly in my last pregnancy!

Here is the Archer that I just finished in Liberty:
Add caption

I made one concession and bought a maternity pattern - the SewOverIt Lilly top, which is specially designed for breastfeeding and actually I think I can wear afterwards too-  Think its a really nice cut and I had 2 contrasting Liberty fabrics which I used to sew it up already!  I put darts in the back and took the side seams in a little as I did find it very baggy, but I do really like the pattern and its an easy sew.


DRESSES:

From top left, clockwise:  Tilly & Buttons Joni dress, Newlook 6301,  Buda 6562,  Newlook 6001, Butterick 5454, Cotton & Chalk Lilly.  I just got the new Tilly Stretch book through the post yesterday and I was super happy to see the new Joni dress, its just perfect for maternity wear but will be absolutely fine afterwards too!

I've already cut out the Newlook 6301 and the cotton & chalk dress in Liberty Jersey I found on eBay.  I cut per the patterns but in both cases I've shortened the bodice by a good few inches so it sits above my bump.  I didn't lengthen as I always find dresses too long anyway, so I was good on the length. I have a few days off over next few weeks when I'm hoping to finish the off - The top part of both are done, just need to do a few finishing touches like the hem etc. Here is a sneak peak:
Add caption


I've been collecting up some jersey fabrics, so will be tapping into my stash of those over the next weeks....


Hope to be sewing and blogging a lot more over coming months, I ll try not to leave it so long next time!  Thanks for reading - if you have any other maternity sewing tips- leave me a comment please!!
Messyessymakes x

Tuesday, 12 September 2017

The Refashioners 2017 #suitsyou


Its Refashioners time again and this year I m part of the blogger line up... eeekkk!  I had a ball last year and am still  amazed I won...  so that set the bar pretty high for what i would come up with this year.


The task this year? Refashion a mens suit.  Luckily my husband has good taste in suits and had a wonderful Burberry number that had a big rip down the leg.  I'd had it in the cupboard for quite some time, so the theme this year was spot on!  I absolutely love the fabric, the details and as I deconstructed, wow I was in awe of whoever made this.  True craftsmanship.
The thing that impressed me the most was the shear number of layers, textures and details in creating the shape and support around the collar and sleeve.  Look at this - the sleeve head had no less than 7 layers of different fabrics.  Needless to say I kept as much of the tailoring intact as I could or reused it.  I kept the shoulder tailoring largely intact.  I couldn't do the same for the sleeve head as it was totally the wrong shape, but I unpicked and re-used several of these layers to add shape to my jacket.

Deconstruction time... as always, it takes way longer than you think when you want to do it well and preserve the pieces intact.  At this stage I hadn't fully decided what pattern to make. I wanted to assess what I had to work with first.  Even though the jacket was huge relative to my size, strangely it was awkward to work with to create a new jacket in a different style...     Messy as always

So lets talk style. My intention was to create a new jacket in a much more relaxed, casual shape.  Here is my inspiration:

I wanted a very simple pattern to use as a very basic structure that I would then free style from.  I chose the Ollie Bomber jacket- I've made it before for my son so I know its super easy and I felt I could hack from that.   I started with the lining.  The lining of the original jacket is something really special with so many lovely details I wanted to keep.  So  I carefully positioned my lining making best use of the original, keeping pockets & all.  I especially love the fact the sleeve lining is stripy!

I made up the lining to check fit.

Fit was pretty ok so I went ahead cutting the rest...  ðŸ˜ž I dug out the trousers which had been in my picnic hamper of scraps for at least 6 months.... the moths had got to them before I did - I held them up to the window so you could see- the whole trousers were covered in  moth holes  AARRRRHGGGHHH.   Wish I'd kept them with the jacket in the wardrobe. So plan B.  I didn't have enough fabric just using the jacket.  So I found a different pair of contrasting trousers, also worn through on one knee.
I used the contrast trousers for sides in the back jacket, the waist, cuffs and neck tie.   I had to do some adjustments around the neck and spent time pinning the waist till I got the  slight 'bomber' shape I was looking for:
Then I simply sewed it all together, fitting along the way.  As you see here (inside of the jacket front), I left alot of  the tailoring in place.
Instead of the usual bomber neck line and zip, I added in a long neck tie, made from the trouser legs and snap fasteners.

Here are some of my favorite details:

I loved the buttons on the original cuff, so I left them, pleated either side for shape and added a cuff band.  I used Prym snaps for the fasteners.  I really love them (they are from Minerva) and  are quite unusual with the pattern on them.  They are a dream to install with the Prym vario pliers.  One other detail is that at the bottom of the necktie I left in the tape that was on the inside turn-up of the leg!  I needed all the length I could get so I used the full leg + hem allowance to create the tie.


The Pockets can actually work two ways.  I think I like the effect above the best, but I can also untuck the flaps and it then looks like this.  Which do you thinks looks better?  I was also tempted to put snaps on the pocket- but resisted.
The neck can be worn either neatly tied in a bow, or can be left open/loosely tied.

Which do you prefer? I can't resist a bow...
So another years Refashioners complete and again I loved it- both years  I have found I learn so much and its so nice to push myself to make something I wouldn't have thought of otherwise.  I'm so excited to see what everyone else has made!!

To stay up to date with the Refashioners 2017, see all the other inspiring refashions  AND find out how you could win an amazing prize (and trust me its AMAZING!)   go to http://www.makery.uk/the-refashioners/

Monday, 14 August 2017

Shanghai & Silk

I recently had the good fortune to visit Shanghai - a business trip, but my sister in law recently moved there so I extended over a weekend to hang out.  To my delight she had done some research into fabric shopping, cue an excursion to the Shanghai Fabric Market.


What to expect?  The place is effectively a shopping mall over many floors (I didn't even go to them all) and basically the focus is on tailoring.  There is lots of fabric and lots of mannequins with tailormade clothes.  Most stalls are offering tailoring services - you pick the fabric and the style and they make it.  But most will also sell you the fabric- so don't be put off.  There are lots of different types of fabric- but suiting/wool and silk are the majority.  I personally didn't pay much attention to anything other than silk.  I wasn't planning on carrying heavy suiting fabrics around with me - but the beautiful silks, thats another matter!!    Just giving you a screen shot of photos from google of it to give you an impression:

The silks there were gorgeous.  Great quality and stunning designs- in lots of different styles. Be warned its not cheap cheap.  But for great silk, I found it acceptable.  I paid 200RMB per metre for most of these 3- which is around £22 p/m.      This is what a typical stall looked like...
I'm regretting not buying the bottom purple one...  I ALMOST did, but decided I'd spent to much.

Tip - have cash.  Across China credit cards are not so reliable (Everyone uses Wepay/Alipay  on their phone).  Tip 2- bargain.  They will be prepared to negotiate downwards a bit- in one place we got it from 260 to 200RMB  (maybe I still overpaid vs what a local might pay but I found it a fair price for the quality). By the way, didn't see any drinks places or anything, so take what you need...

So... onto my purchases!!  I bought 3 silks, all heavily patterned of course...because I just don't really do plains.

This first one has the feel of what I call a regular silk (sorry, I really should have better knowledge on how to describe the different ones!)  but its really quite thick & sturdy for a silk with a matt finish- so I m hoping it will be good to sew with.  I love the colours and little birds on it.  I m planning a skirt.
 This one is so, so soft with an amazing drape. I think it would make an amazing bias cut dress or maybe a blouse.


And finally this one is 97% silk with 3% stretch.  Its more shiny than the other 2 and lighter weight.  I just loved the design- so many details with all the flowers and little bugs in there - do you spot them?!  It looks designer, I feel like I've seen it somewhere... anyway its quite busy so I just bought 1 metre to make a top.


 I was so excited by this one, I cut into it the day I got home!!  After much thought on the plane, I decided to go for just a really straightforward top with a few ruffles.  I used my regular top block to make a simple shape with front darts.  I then made ruffles for the sleeves and round the bottom with what I had left!!    I would have preferred to finish the top with a facing but I didn't have any fabric left so I used a contrast bias binding for the armholes and neck - which works ok actually.


I'm super happy with this top- I m sure I will wear it lots.  The silk feels amazing and actually to my amazement it was a dream to sew! I actually avoid sewing silk- my previous adventures have been frustrating and difficult (silk pulling out of shape, impossible to unpick, pins plucking it...) but this first one was perfect to work with- maybe thats a sign of quality!  


So to round up, what were my overall thoughts on Shanghai?  I really liked it.   It was a short visit, but I found people really friendly and with the help of a smart phone, getting by was much easier than I expected.  Of course it was wonderful to catch up with my sister-in-law and have a guide who had already found some great places too!   We ate some amazing food- they have a great selection of brunch places and all the regular types of food you would expect in such a major city- and some brilliant bars.  It feels a really safe place to walk around and has a real buzz about it.  I found people had a real sense of living in the now- a mindset that anything was possible and felt people really valued and embraced self expression.  Anything goes when it comes to fashion there!  But boy was it hot and humid!  The first day I was there we had tropical storms all day long (hence the amount of time I spent in eating & drinking establishments) and then it was nearing  40 degrees, with high humidity for the rest of my stay- and frankly, I m not designed for that climate!   Hope you enjoyed reading about my adventures with Chinese Silk & seeing my purchases. Any more tips for Shanghai let me know as I'm sure I'll be back there at some point in the future.
Estelle x