BLOGLOVIN'

Follow
Showing posts with label Handmadewardrobe. Show all posts

Sunday, 10 March 2019

Jasper sweater love

I love a good sweater - since I discovered Liberty sweater fabric I haven't looked back, actually spending a lot of time wearing them - perfect for working at home, being mum, late night feeds, running around the playground - you get the idea. 


So far every one I have made are using the Grainline Linden, and variations thereof.  I like but don't love this pattern.  Its just not as cosy as I would ideally like- the neck is too wide for my liking and I always wish it had pockets.  

So I finally got around to sewing up the Jasper sweater by Paprika patterns.  Now I'm ashamed to say I've had this pattern in my stash for a good few years and I knew I would love it the minute I saw it, but I didn't tackle it as I assumed it would eat fabric and that it would be complicated with welt pockets and all.  I am very pleased to report that I adore this pattern and neither concern proved to be true.  

The reasons I love it... its everything the Linden is not - snuggly & cosy, a little fitted and HAS POCKETS!  Its a straightforward sew and making the pocket is especially satisfying.  It  must use more fabric than the Linden, but because of the piecing, you can combine fabrics using up some scraps so I find it quite economical (I don't like to have to buy more than one metre of Liberty sweatshirt fleece/loopback due to cost and happily managed both of the below with that plus scraps left from other stuff.)

And there are 3 options- a hood, a funnel neck and a dress version.  I ve made the first 2, dress to follow ;)


Here is the first one I made and the sad story of my fabric letting me down... grrrrr. 

Its made with a Liberty Loopback, bought from Guthrie & Ghani with a contrasting Denim look Loopback from my stash.  Then I used a navy flecked jersey for lining pocket & hood.  I absolute love it.  


I really like the fit of the pattern- no adjustments at all, it fitted great.  I find the side panels give a bit of shape and structure and the contrasting fabric choice makes it look quite streamlined and less bulky than most sweaters.

The hood on this jumper is absolutely huge.  Its fine down, looks actually quite nice being chunky, but you just wouldn't wear it up - I could actually fit 2 heads in it.
The only negative I have on this are firstly the size of the hood and secondly, I don't like the way the hood is finished, a lot of seams would be visible, and very visible when it is so huge! Loopback was white on reverse, looking terrible so I lined the hood, but it was difficult to attach- next time I would construct hood differently and significantly reduce size.

Giant hood alert!!

I'm gutted to report that since washing it has incurred some issues.  I can't remember where I got the denim loopback from but its letting me down.  Some patches have gone really strange meaning one side looks totally different to the other- really don't understand it.  And when I ve washed it, its started coming away at the seams in 2 places- I've sewn alot of knit fabrics and I've never experienced this before!!.  Note to self,  never risk mixing Liberty fabric with an unknown quality one.  
 For my next one, I m using a trusted loopback from Fabworks with the Liberty to ensure it will stand the test of time...So onto version 2, this time without the hood.  This version I find more practical to wear actually- the neck sits nicer when not puled back by the giant hood and it fits easier under coats.  I've lived in this one since making it.


I started with the Liberty (also loopback from  G&G) and went through my stash to look for a royal blue to combine with it- but then I came across this duck egg loopback and it just looked perfect.  So that was that!  I then used a scrap of red as a pocket accent and then choose a very thick fleece back jersey for lining the neck- a nice contrast and the body helps the neck sit nicely and makes it extra snuggly.


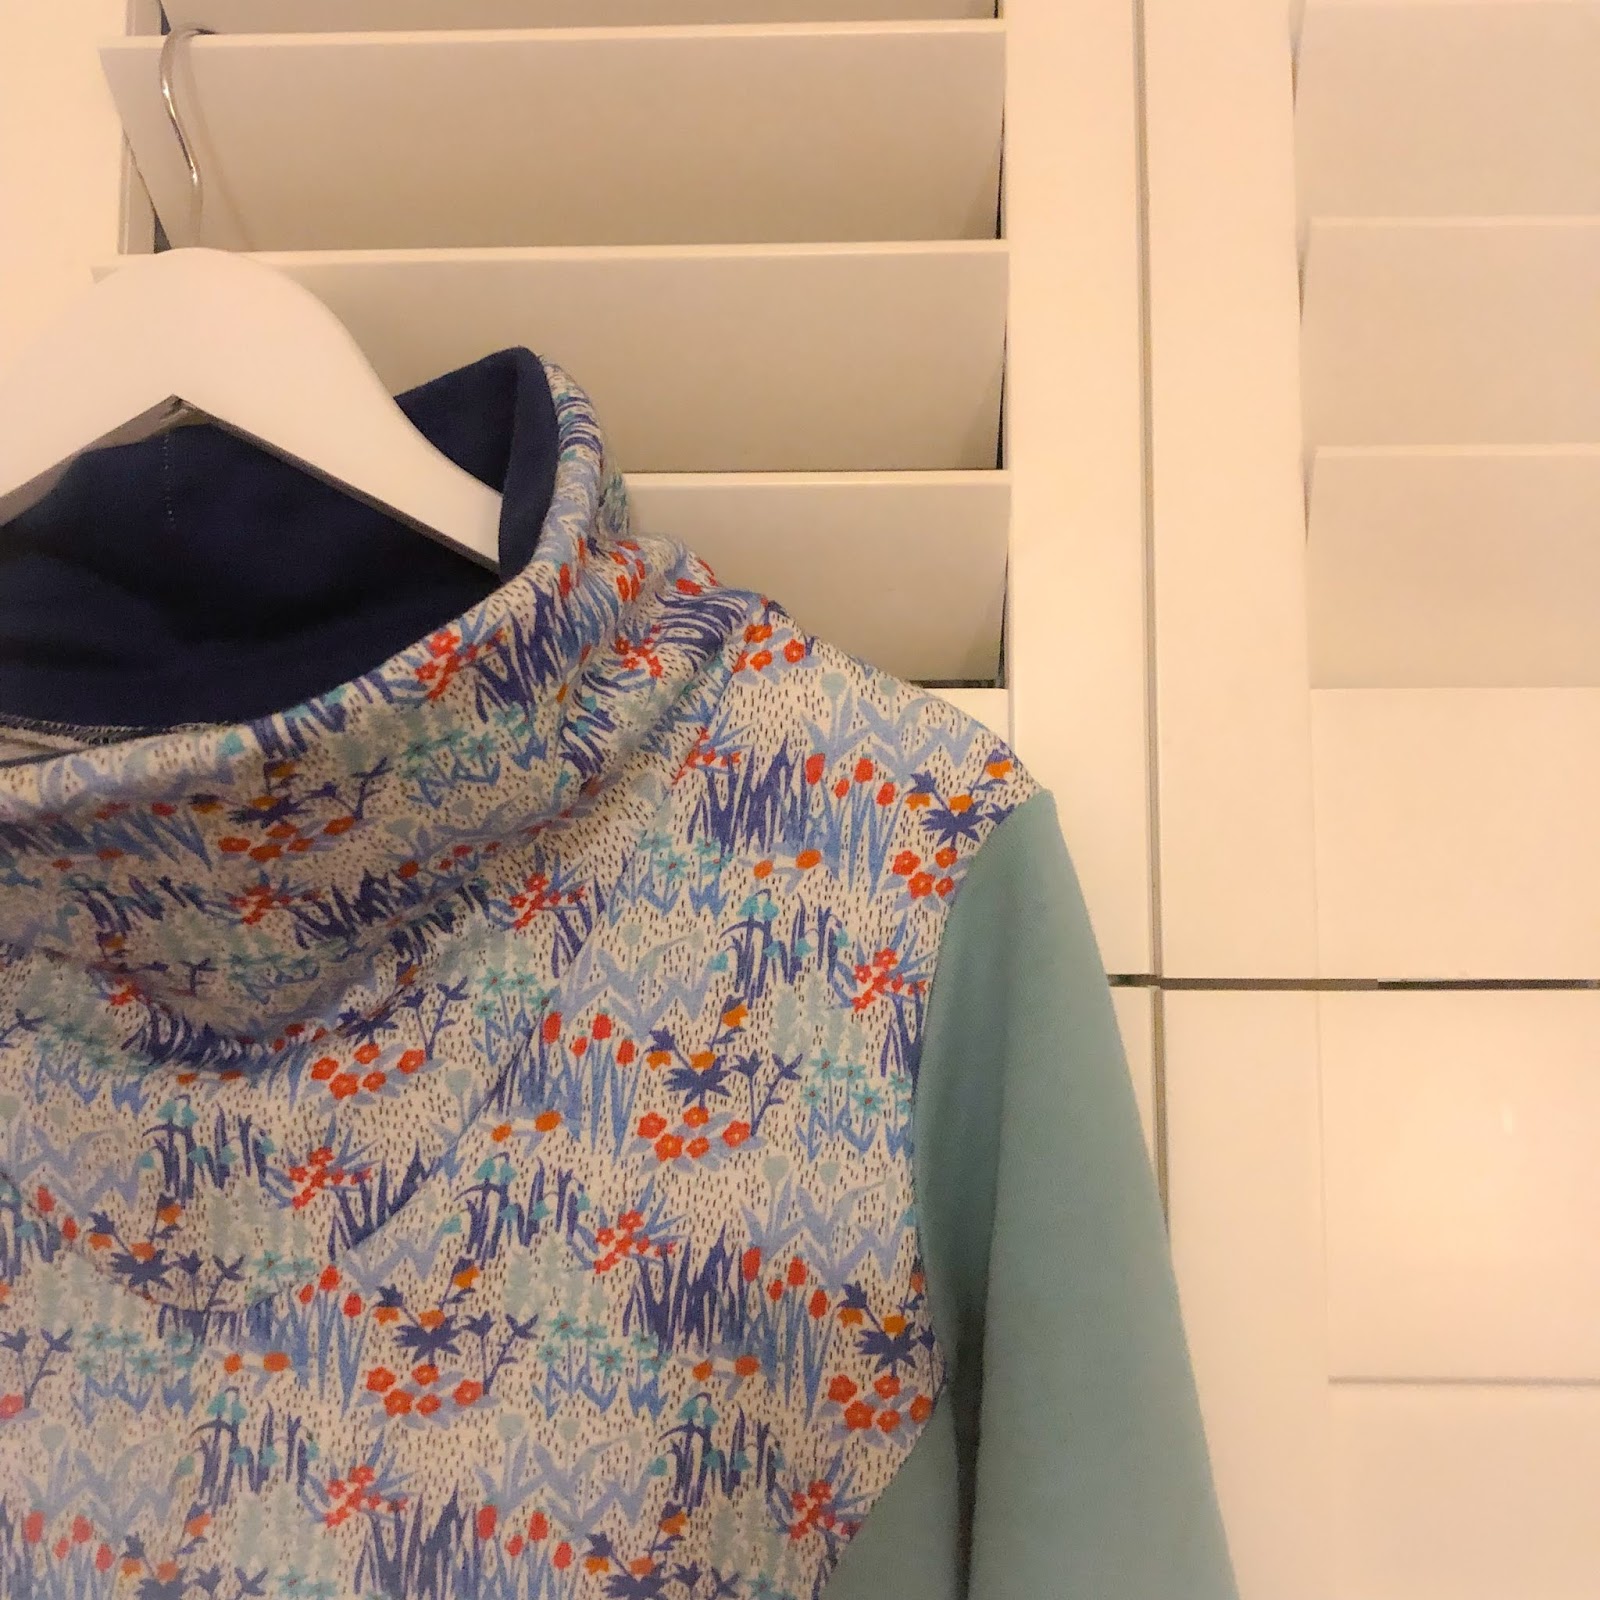


I just love this.  Everyone needs one of these sweaters in their life!!


Sunday, 17 February 2019

Deer and Doe Myosotis Dress

Wow, what a long time since I wrote a blog post!  6 months with a new born and I ve spent every available second (not that many) sewing rather than blogging about it.  So lets go with a few posts of what I ve made in the past months!

Firstly the Myosotis by Deer and Doe. I had seen so many lovely versions of this that despite it not being my usual style, I bought it!  I had some  reservations whether it would suit me when made up as I don’t really go for loose fit, full of ruffle items! But I m bigger than normal post baby and breastfeeding so I thought it a good choice for those reasons!

I bought fabric with the intent to use for this project, a navy and white stripe with floral embroidery. The fabric itself is quite lightweight but it gets bulky around the embroidery which maybe makes it a bad choice for such a ruffle heavy garment!

I cut out a size 14 and it needed no alteration other than taking the arm hole in slightly. The instructions are very clear and I found it an easy sew, though I m tired of gathering fabric!!

The biggest issue I had was the fullness/ I lined the skirt as it was a bit see through and 2 layers plus the embroidery made it quite heavy on the placket and seams so I'd avoid textured fabric for this pattern in future.


I actually just overlocked the hem rather than turning it under, as it became too think if I hemmed it !

Another thing to note is I find it goes over my head fine without needing opening buttons so next time I would skip button holes and just sew them down or even hack a version with a one piece front, no buttons. I think a version with pin ticks down the front would look great!


I chose to go sleeveless as it was for my holiday- I didn’t make pattern alterations for this, I simply took it in a bit more on the side seam below arm and finished with bias binding.


So, do I like it? Simply, yes- but I need it to be less full / loose than the pattern. Made up per pattern I feel huge in it. So I made a tie for the waist and with that small adjustment I like it a lot.

One final point - I don't like the way it asks you to finish the collar. I found it very difficult to ensure it was neat at the edges and with the over stitching.  I therefore prefer to follow the instructions from the Grainline archer instead.

I already made a second version, this time with sleeves- but this time I  replaced the skirt with something less full- a simple A-line with side slits and some front pleats for a bit of body.


I find it a super comfortable but stylish dress, with the pockets a bonus! How do you like it?


Sunday, 11 March 2018

Maternity Sewing Plans

Phew its been a long time since I did either sewing or blogging...  the reason being, not only have I been crazy busy with work and travelling a lot, I am also pregnant!  And for the first 3 months I was terribly sick... in those months I did nothing but sleeping, working and being sick.  Anyway as I headed into my 4th month, the sickness thankfully ceased and I got back to feeling like me again.

In these past weeks therefore, I m back sewing, creating my perfect baby wardrobe. I say baby wardrobe as learning from my first pregnancy, I don't really believe in 'maternity wear'.  You can wear your regular clothes for at least the first 4 months, there are then 6weeks when you fit in neither normal nor maternity wear particularly well - then maybe 4 months tops when you need full on maternity clothes.  Thats not long, to be buying or creating a whole set of new clothes.  As with my first baby, I plan to breastfeed and that period actually lasts a whole lot longer than the time you need maternity wear and also has very specific clothing requirements.  And finally- no one tells you beforehand that it will be a bloody long time before your usual clothes fit again!!  And I really didn't enjoy 'maternity wear'  post baby with all that extra fabric around the waist, making you feel even bigger than you already are!  

I set myself one golden rule to creating a wardrobe for my second baby...

 Anything I create must be wearable both in pregnancy, during breastfeeding and ideally after that (maybe with a few alterations).

I m not a fan of the maternity look, I found last time the things I wore most were regular  jersey dresses and tops (mainly from Boden or Joules)  with a high waist under the bust or wrap dresses/tops.   There are a few things I think you can't live without - appropriate underwear, maternity tights, a few vests and maternity jeans.  But for dresses and tops, I think 'regular wear' carefully chosen can suit quite fine, with much more longevity.   Here are a few of the (RTW non maternity) dresses I wore lots last time:

And here are the me-made things I've worn non stop for the first 4 months that well accommodate a small bump- basically stretchy dresses, shirts & shirt dresses, tunic style tops and sweatshirts.


On to the sewing plans! Here is what I have on my list, some of which I've started on already...

TOPS:

From top left, clockwise: Tilly & the buttons Rosa, Grainline Archer, Tessuti Alice Top, Vogue V8816, Sewoverit Lilly, Burda 6838.

First up, for early pregnancy (months 3-5) and for breastfeeding and later... shirts.  I 've just finished one new Archer in a gorgeous Liberty and have plans for one more as well as a Tilly & the Buttons Rosa dress in Liberty Needlecord to make after the birth.  I've worn my current one non-stop in the past weeks, but now its reached its limit.  I know I'll wear it all the time for breastfeeding since its got  easy open popper fastening and is super comfy.  I also know V8816 works well as I wore that constantly in my last pregnancy!

Here is the Archer that I just finished in Liberty:
Add caption

I made one concession and bought a maternity pattern - the SewOverIt Lilly top, which is specially designed for breastfeeding and actually I think I can wear afterwards too-  Think its a really nice cut and I had 2 contrasting Liberty fabrics which I used to sew it up already!  I put darts in the back and took the side seams in a little as I did find it very baggy, but I do really like the pattern and its an easy sew.


DRESSES:

From top left, clockwise:  Tilly & Buttons Joni dress, Newlook 6301,  Buda 6562,  Newlook 6001, Butterick 5454, Cotton & Chalk Lilly.  I just got the new Tilly Stretch book through the post yesterday and I was super happy to see the new Joni dress, its just perfect for maternity wear but will be absolutely fine afterwards too!

I've already cut out the Newlook 6301 and the cotton & chalk dress in Liberty Jersey I found on eBay.  I cut per the patterns but in both cases I've shortened the bodice by a good few inches so it sits above my bump.  I didn't lengthen as I always find dresses too long anyway, so I was good on the length. I have a few days off over next few weeks when I'm hoping to finish the off - The top part of both are done, just need to do a few finishing touches like the hem etc. Here is a sneak peak:
Add caption


I've been collecting up some jersey fabrics, so will be tapping into my stash of those over the next weeks....


Hope to be sewing and blogging a lot more over coming months, I ll try not to leave it so long next time!  Thanks for reading - if you have any other maternity sewing tips- leave me a comment please!!
Messyessymakes x

Sunday, 23 July 2017

Memade Orla Kiely Skirt


I picked up 2 different Orla Kiely fabrics at Fabrics Galore, London recently.  I can't resist the bold prints of Orla Kiely and I'd never come across their fabrics for sale before, so I snapped them up!  They are truthfully furnishing fabric I think, relatively heavy weight. But I couldn't resist making a skirt out of the first one.  I pre-washed it to check it washed ok and it did - it frayed massively (note to self, should have overlocked the edge before washing) but it was fine, phew!  Let the plans commence.


I recently made up this Butterick pattern in denim and have worn it non stop, so it was the obvious choice. This is my first sewing after 3 weeks holiday, so i was dying to get back behind the machine with a relatively quick, indulgent and fun project.


So it was a straightforward make. I worked hard to pattern match behind the pockets and I did my best on the pleat from to have a complete pattern repeat either side, which works quite well.  I was unsure with the waist band whether to do the pattern across or down - but doing down, it would never perfectly match the skirt due to the pleat, so I went for across.


 I wanted a different style of pockets so it wasn't too intrusive with the pattern so I free-styled that and chose to put some piping at the top of the pockets as a feature:


The only other deviation from the pattern that I also did with my previous version was to add some shape to the waistband.  The pattern piece is a perfect rectangle- which personally I don't think works - I m not sure anyone would have a perfectly rectangular waist when the band is so thick.  So my technique here is to sew the front waistband to the front skirt  and shape off the waistband following the line of the skirt (so effectively cutting a triangle off each corner).  I repeat for the back, then sew the front & back together in one go.


The final details I wanted to share are on the inside.  I had a dust bag for an Orla Kiely handbag so I cut that up and used it as the facing fabric for the waistband as well as the inside of the pockets.  No one else sees it but it makes me happy to have the iconic stem print on the inside too.


I did alot of topstitching - I was undecided but the fabric felt like it needed it for stability, especially down the side seams and around the front pleat, so I also did some top stitching on the waist band too.  Probably not everyones cup of tea, but I m quite happy with it- gives it a more informal vibe and I m hoping strengthens the seams too.

And finally,  I used bias binding on the hem.  The fabric frays heavily so needed properly finishing and was too thick to double turn up- so this seemed like the best solution.


I m so happy with this skirt.  I love the pattern and the colours and the style of this really fits me perfectly.  I love skirts that fit snugly on the hip, have a bit of body and also have pockets and this ticks all three boxes.


Messyessymakes
x


Saturday, 15 April 2017

My watson jacket

I fell in love with the Papercut patterns Watson Jacket the minute I saw it!  I spent a long time considering fabrics, in the end I bought this wool from Fabworks Mill shop. Its a great fabric and I m really happy with my choice for this project.  Its a lovely grey/blue colour with flecks of different white/blue shades throughout and a thin black stripe.


Of course with any jacket, cutting out is one of the biggest jobs!!  With the coat, the cape & the lining thats a lot of pieces.  The pattern only asked you to interface a few pieces.  But I wasn't confident that gave enough structure, so I followed what I did in my Francine jacket making process interfacing a lot more.  I didn't cut it very accurately as I was using some odd shaped scraps I had to work around, but I did the top & bottom of all pieces on back & side body, then interfaced the full front pieces.


so first up putting the cape together - easy bit and exciting!
 Next up the bit I found most tricky.  I totally fell out with the instructions, couldn't make sense at all on what was supposed to be sewn where.  You basically sandwich the cape with the side pieces, but its where to align at the top that caused me issues.

So first time round was a disaster, it clearly was sewn in the wrong place as nothing lay flat round the neck and the back was way lower than the front... grrr


The only way I could make it work was by unpicking, sewing the bottom side seam up towards the underarm (that bit should definitely meet!) and sewing the cape to the back as that should also be flat,  then doing this on my dress form to work out where the shoulder bit should come together so everything else works flat.

 So this is what it should look like

then on the next step you are eventually aiming for all the bits to come together neatly.  One side on mine is a lot less neat than the other but you live & learn & I d already done too much unpicking to risk any more on this fabric ( I was already on my second front panel and didn't have enough fabric to cut a 3rd!)


 So much cursing had happened, but when I finally made sense of it, look, its looking good!
 The rest was quite straightforward.  Quickly put the arms in and made up the lining.  I wanted to make a special effort with the lining so I used a chambray grey piping with my new piping foot and Liberty tana lawn lining which looks stunning, even if I do say so myself.

I still lined the sleeves with satin as i find that much smoother for getting on & off and in wear, but the body lining is perfect in tana lawn.

And I didn't forget to sew in one of my tags!   I was tight on fabric so I didn't get the  stripe pattern matching perfectly on the facing, but hey, lets call it a design feature ;)

Attaching the collar was fine, just I had an issue with bulk- Collar, coat, cape all sewn together with 4 of the pieces interfaced makes for a big thick bit!! If I was doing it again I would perhaps look to attach the cape or collar differently so they don't all meet. Or sew the facing of the coat and the back of the collar with a lining fabric thats much thinner to reduce bulk.  But with some good trimming and layering of the seam, its ok. Actually it looks really bulky on the hanger but when you wear it you can't feel or see it.


I bagged the lining following the Closet Case Files Clare Coat directions - see the guide on their website as it worked magic last time and did again here.


So one final thing I should tell you about - fate meets opportunity. I had a small scissor incident and when I cut my 2nd front piece, I got it too short.  Don't ask.  And as I already mentioned, I hadn't enough fabric for a 3rd attempt.  So I shortened the other front piece and decided to engineer a dipped hem.  I absolutely love it. I think its better in style than the original, I m so happy with my mistake (and its not often I say that).  I cut the other front piece to same size as my mistake piece, then I graded the sides down to the original length at the back, creating a sweeping hem line.  I also took it in a bit more at the sides to create a great silhouette on. 


As per my previous coats, I wasn't going to ruin it with sewing button holes on my machine so I basted position of button holes and went to DM buttons in SoHo who kindly did them for me on their industrial machines for £5.  Money very well spent.

So there we go, I love this jacket.   When I started it, I had in mind it would be a lightweight spring jacket as the wool fabric is not so thick.  But actually with the interfacing, lining and the fact it has so many layers, it is rather warm!

Here is the final jacket, on & off.  It looks great with jeans.  I'd recommend this pattern for sure, just have a rough go of working out the assembly of the body/cape before committing your precious fabric. ;)


Now my final thing- I m not sure I sewed the buttons in the right spot.  The collars are equal in size, I ve triple checked but they don't look it on and the front hangs down a bit.  I think I need to redo the buttons, pulling the front further over so the front piece goes higher up under the collar and the collar pieces come closer together.  What do you think?  I already re did the buttons once,but they are not right are they?

Messy Essy Makes
x